
Understanding Vapor Barrier Installation
What is a Vapor Barrier?
A vapor barrier is a protective layer, typically made of plastic or foil, designed to prevent moisture from penetrating into walls, floors, and ceilings. This barrier is usually installed in areas where humidity and moisture can accumulate, such as basements and crawl spaces. Properly installed, a vapor barrier can help protect your home from mold, mildew, and structural damage caused by excess moisture.
Importance of Vapor Barrier Installation
The significance of vapor barrier installation cannot be overstated. Moisture can lead to a myriad of issues, including weakened structures, unhealthy air quality due to mold growth, and costly repairs. Installing a vapor barrier is a proactive approach to safeguarding your home. By effectively reducing the moisture levels, vapor barriers can enhance the overall lifespan of your property and improve energy efficiency. The investment in Vapor Barrier Installation pays off through long-term savings and a healthier living environment.
Common Misconceptions About Vapor Barriers
There are several misconceptions surrounding vapor barriers. One common belief is that they are only necessary in humid climates. However, homes in colder climates can also experience moisture-related issues due to condensation. Another misconception is that a vapor barrier will eliminate the need for ventilation, which is not the case. Adequate ventilation is still essential to ensure fresh air circulation and prevent air stagnation.
Preparing for Vapor Barrier Installation
Assessing Your Crawl Space
Before beginning your vapor barrier installation, it’s crucial to assess the crawl space. Look for signs of moisture problems, such as mold growth, dampness, or a musty odor. Ensure that the area is free of debris and that any leaks or plumbing issues have been resolved. Proper drainage around your foundation is also essential, as it can significantly impact moisture levels.
Materials Needed for Installation
To install a vapor barrier effectively, you will need several materials:
- A quality vapor barrier material (usually polyethylene sheeting, 6 mils or thicker)
- Utility knife or scissors for cutting
- Tape (vapor barrier tape is recommended)
- Stapler or fasteners for securing the material
- Measuring tape for accurate dimensions
Safety Precautions Before You Start
Safety should always be a priority when handling vapor barrier installation. Ensure you wear protective gear, including gloves, goggles, and a mask, especially if you encounter mold. Proper ventilation is also important to avoid inhaling harmful particles. Use a flashlight to inspect dark areas and be cautious of hazardous conditions such as sharp objects or unstable ground.
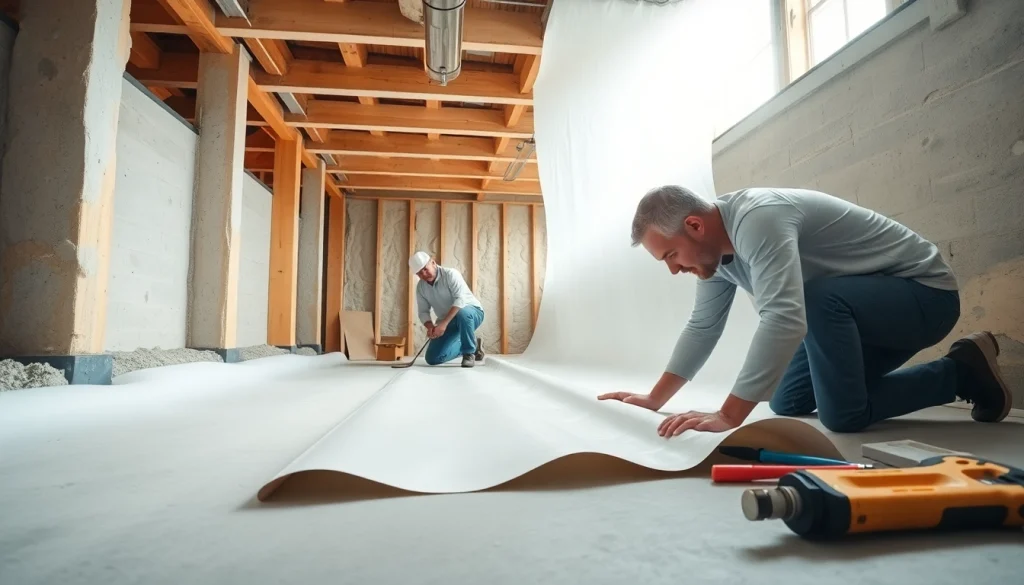
Step-by-Step Guide to Vapor Barrier Installation
Cleaning and Preparing the Area
Begin by thoroughly cleaning the crawl space. Remove debris, old insulation, and any existing vapor barriers. Check for signs of pests or mold and address these issues before proceeding. Ensure drainage is directed away from your home’s foundation to minimize future moisture intrusion.
Proper Techniques for Installation
When laying down the vapor barrier, ensure it covers the entire crawl space floor and overlaps at the seams. Use the measuring tape to cut the material to the right size. It’s advisable to extend the barrier up the walls to prevent moisture from seeping in. If there are support columns, cut holes in the vapor barrier so it can slide around these structures.
Sealing and Securing the Vapor Barrier
Once the vapor barrier is in place, secure it with tape or seal it with fasteners along the edges and seams. This is vital, as it ensures no moisture can penetrate through gaps. Make sure to seal any punctures or tears in the material to maintain its integrity. Regularly check the installation for any wear and tear.
Maintenance and Troubleshooting
Regular Inspections Post-Installation
To ensure the efficacy of your vapor barrier, conduct regular inspections. Look for signs of moisture accumulation, such as discoloration or condensation on the barrier. Inspect the surrounding environment for drainage issues or leaks that may affect the barrier’s performance. If problems are detected, it is essential to address them promptly to avoid further complications.
Signs of Improper Installation
Signs that indicate improper installation include visible moisture on the barrier, mold growth, or an increase in humidity levels in the crawl space. You may also notice an unpleasant odor emanating from the area. If you observe any of these signs, it may be necessary to remove and reinstall the vapor barrier.
How to Address Common Issues
If you encounter issues with your vapor barrier, such as tears or improper sealing, consider reapplying tape or using adhesive where needed. For persistent moisture issues, evaluate external factors such as drainage and humidity in the crawl space. Sometimes, obtaining professional help may be necessary to ensure long-lasting results.
FAQs About Vapor Barrier Installation
How long does a vapor barrier last?
A vapor barrier can last several years if installed correctly and maintained. Routine inspections are crucial for identifying issues early.
Can I install a vapor barrier myself?
Yes, homeowners can install a vapor barrier themselves with the right tools and materials. Following a detailed guide can ensure a successful installation.
What happens if a vapor barrier is not installed?
Without a vapor barrier, moisture can infiltrate structures, leading to mold growth, wood rot, and other significant damage.
Are there different types of vapor barriers?
Yes, vapor barriers come in various materials and thicknesses, such as polyethylene or foil, depending on the specific moisture conditions of your environment.
How can I tell if my vapor barrier is effective?
Check for a dry crawl space, absence of moisture buildup, and overall air quality. Regular inspections will help determine its efficiency.